Friday, August 29, 2014

those medallions

To be completely honest, I wasn't crazy about those medallions or whatever you want to call them on the drawer fronts. They just looked too crispy, too foreign on there. However, I was pretty sure I could make this work. I showed hubby, who assured me that they were going to flake right off as soon as I hit them with sandpaper. I pooh-poohed his nay-saying, and started trying to reign them in this morning.


As you can see, the spackle had dried in very definite lines - which is okay, if that's what you are looking for, but I wanted something a little more subtle. I was not as pessimistic as hubby. I believed I could use foam-mounted sandpaper to very softly and subtly make this more pleasing to my eye.


I started out slowly to get a feel for what the material could take. It definitely didn't flake off, although it didn't take much to make it more like what I was thinking. 

After figuring out how hard to press and how much I could do with taking the edges down, I went to town on the rest. They look like I decimated them, but I didn't. They were much more to my liking once I took that extra dust and powder off!


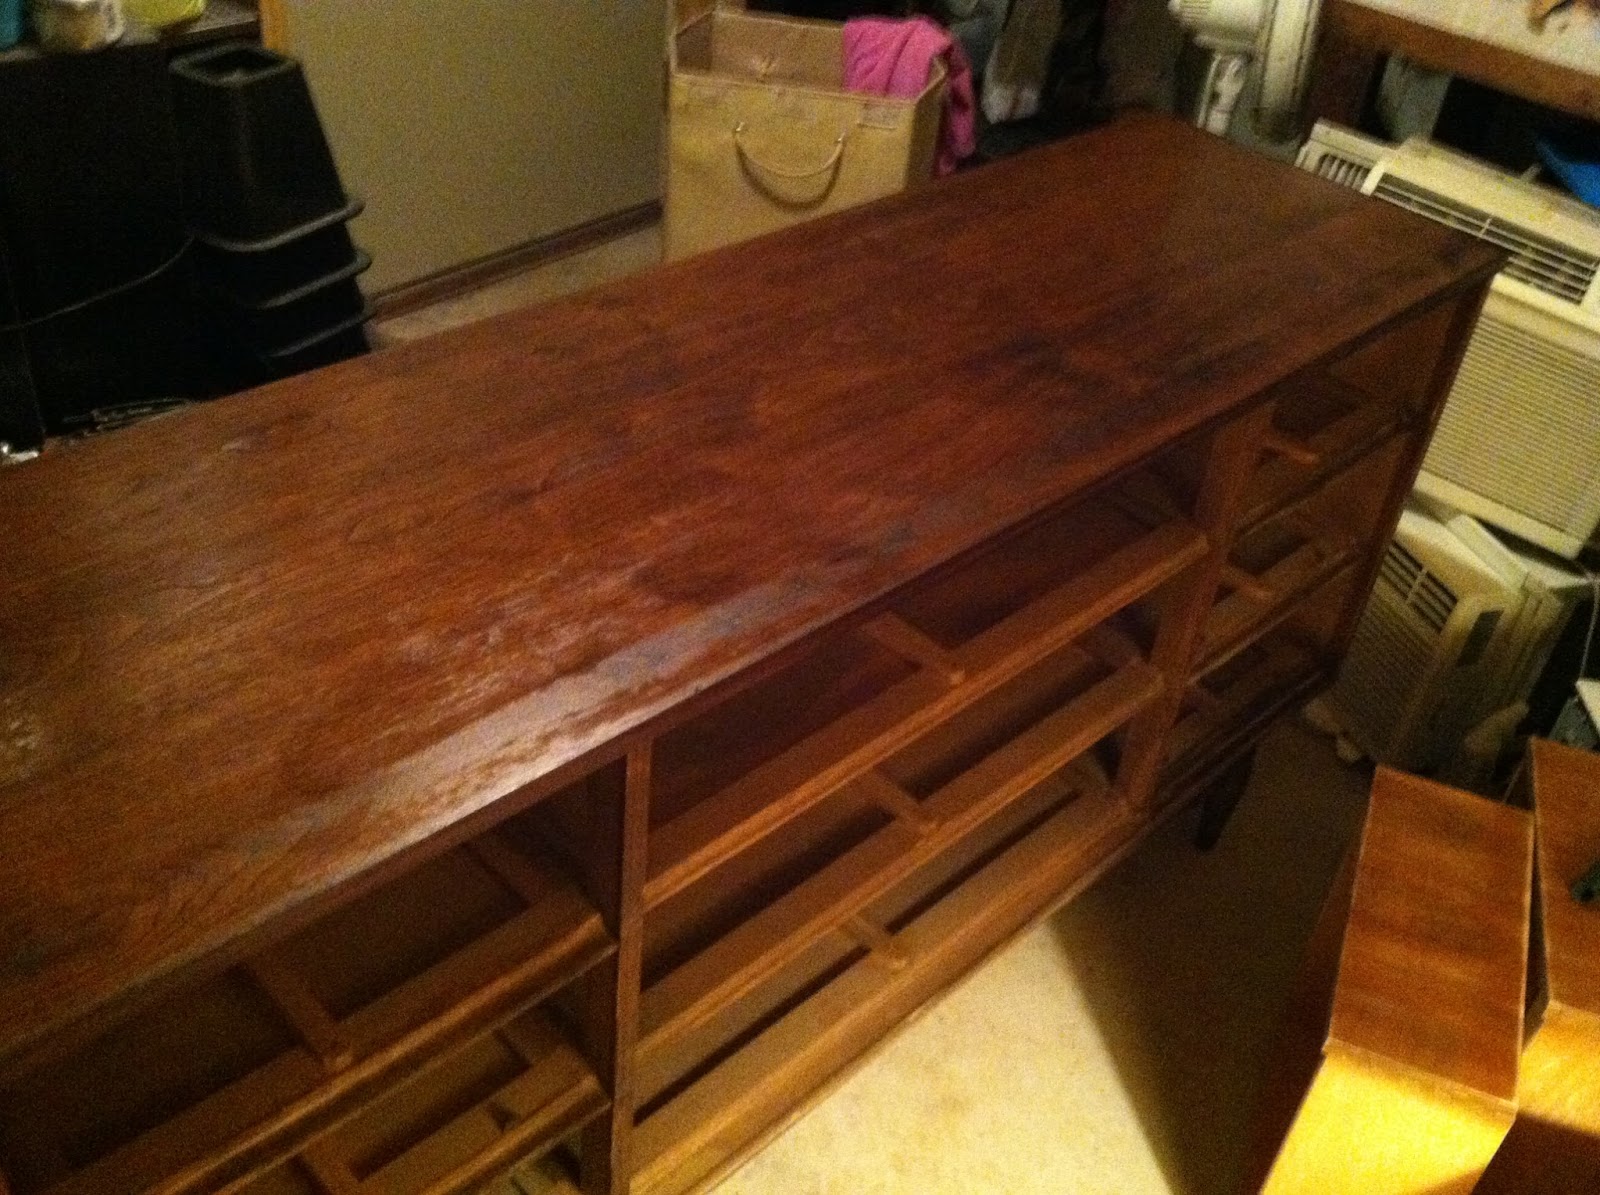
The other problem I was having was with the dresser top - my ebony stain was not coming out ebony. I am up to three coats, with a very light sanding between the second and third. We've agreed that it is acceptable. I have noticed that there are spots on the top where I had sanded it more than the rest, apparently, to get the stains out - they are taking more of the stain in. I must have gotten down to a little bit deeper layer of the wood. Weighing out my options of trying to take it all down to a deeper level and restaining, painting it instead of leaving it natural wood, or leaving it as is, we're going with leaving it as is. I think it will still be beautiful.

The other step I took today was to throw a coat of primer on the cabinet. I just really, really want to see how this is going to look! I didn't have time today to paint the drawer fronts, and I left the legs of the base unpainted even though they will also be white, because I didn't feel like being that close to the floor with my face, to see what I was doing under there, but I think you can agree this is showing promise!


I'm giving this a full day to dry, because we're heading to the fair tomorrow. It might get even more than a day, because we have a family reunion the following day - hope you enjoy your Labor Day weekend!

Wednesday, August 27, 2014

Dresser make-over

So I want to catalog my progress on my current project, in addition to highlighting some of the projects I've already completed, in order to try to keep up the momentum and stay on track. As I've already admitted, I tend to get distracted from projects and end up having them sitting around collecting dust instead of being the useful, beautiful objects I envision them as.

My daughter brought home this neglected dresser free from a yard sale at the beginning of the summer. The drawers didn't all slide nicely, it had a loose leg, a bit of a warp in the backing, and was sort of...eh.


Turns out they had some of the drawers in the wrong spots, because as I took a little time to try them in different areas, they seem to slide a little better. There was paint and marks on the top, though, and it just wasn't anything we wanted in our living area. It was something I wanted to try my hand at redoing, though.

The dresser has sat in the basement patiently waiting until I finished my schooling, and now offers me the pleasant distraction of taking my mind off of my test results by trying to figure out what to do with it. Daughter 1 didn't want it anymore; she hasn't room for it in her apartment. Daughter 3 said she would love it, but wants it for a buffet to use for dishes and linens - which goes perfect with what I have in mind. 

I spent a few days going through Pinterest and Hometalk, gathering ideas and inspiration. We decided on a creamy white, with a secondary accent of a slightly darker shade of white (and I know how odd that sounds, but the paint store has 141 shades of white!) I really did love some of that wood, though, so we decided to try to get the top to a place where I can stain it darker, and have the top stained but the rest of the cabinet with the two whites.

I brought out my beloved new hand sander and planned to simply go over the top, but ended up hitting the sides of the drawers so that they will slide better and the fronts, just to take off the finish.


We opted to go with ebony stain, but this is very hard wood and doesn't feel like taking up much of the stain. My plan is to go over it again once this bit has soaked in, to see if it will darken. I have since heard of Java Gel stain, but I'm trying not to keep buying materials, so that my *free* furniture project doesn't end up being my *million dollar* project.


See those three drawers the lamp is sitting on? We also had to decide how we want them to go in, because I wanted to try a neat idea I had seen on Pinterest - I wanted to add texture to them. Initially I wanted to adhere a textured wallpaper to the parts we wanted to highlight, but we couldn't find one we loved at Lowe's, and Home Depot had even less. I kept searching, and found an idea for stenciling with spackle, or joint compound, and then going on as thought the texture is part of the wood.


trying to decide which way to do the pattern.

This also took more time than planned, because I had a stencil we thought would be great, but turned out it is not a real stencil at all, but more for screen printing. It will still work quite well for paint, but not texture. Back to the store we went, and daughter 3 picked out a stencil she liked. 


Back in the basement, it turns out that this is much more work than it looks like it would be. The spackle I used (goes on pink, dries to white when it is dry) is slippery, and goopy, and the stencil wasn't taped on. I tried to tape the drawers together, then ended up stenciling over the tape. 

see where the tape came up and the stencil lifted?
I think that will work out, though, because I will be sanding bits of the stencil off here and there, in order to give it a rougher, more used sort of look. 

So it all sits with a fan on it, drying, at this point, because I have to run out and don't have time to start painting and still be clean for my meeting. Stay tuned, I'll have updates as the progress continues!

Tuesday, August 26, 2014

Put your feet up and stay a while

Another project from last summer is the footstool I made out of an old soda box I've had kicking around. I used a piece of board I had left over from a project I had some wood cut for and never finished, some cushion donated from a friend's old camper, and the remainder of the lovely fabric I used to redo the seat on my renovated chair. I love how it came out, although I have it filled with magazines at this point to keep the top at the right level. I plan to put a couple of pieces of wood on the inside to keep the top from sinking too low, but have yet to get around to that. I wanted to be able to take the top out so I can use this for storage, so it's important for me to not have it permanently attached. 

You can see it here with the chair I redid - although the one is painted and the other is not, the fabric ties them together well, I think. The height of the chair works better for me with this footrest than with the HP desk, too. 

Monday, August 25, 2014

Hits, and misses

This chair, which I neglected to get a before picture of, was purchased the same day as the HP desk, albeit from a different yard sale. I went back to this sale after getting the HP desk home, and paid $20 for this chair - but it was hideous. It had a yellow paint job that had been grossly antiqued with a brown layer over it, underneath a few years' worth of dust and dirt. The seat was covered with a very dated gold fabric adorned with eagles - the type you see on 70's patriotic materials. At the time it was done, it might have been in style. Someone else's style - not mine. 

I wanted white, and something to go with the teal-ish wash on my HP desk legs. I love the way the chair came out.
The problem with the chair is that it is just a smidge too tall. I am not short, at nearly 5' 7", but this chair is too tall for me. When I took the hideous gold eagle fabric off, the original leather seat was still on the frame. I didn't want to destroy that, so I simply added a layer of batting to make more of a cushion and covered it with my lovely fabric. I don't think the layer of batting makes that much difference, but perhaps it does. What I do know is that my feet do touch the floor while I am sitting in the chair, but my knees are not really at a 90 degree bend, which would be optimal. Also, the arm rests are a good two inches below my elbows. In order to rest my arms, I find myself slouching to one side - also not optimal. When I combine this chair with my HP desk, I usually end up putting my feet up on the support of the desk instead of on the floor, and then slouching in the chair. So while I love the look of this chair, I am going to continue to search for the perfect HP desk companion seat.

HP desk

My obsession

I've been drooling over pictures of fantastically renovated furniture on Pinterest and Hometalk for months and months, dreaming about the time when I would get some time/money/ambition/free furniture to try my hand at some upcycling. I'm posting this after the fact just to bring everyone (ha! my mom, most likely, and she's already seen my projects,) up to speed. 

So I found this table at a yard sale last summer and fell in love with the legs on it. I cruised the rest of the junk for sale trying to work up the nerve to ask how much - I hate yard sales where they don't price things. I want to look and leave without haggling, not have to ask a price for every thing I might want. This table was worth asking. When they told me it was $5, I tried hard not to jump over the piles of stuffed animals to give my money. What a deal! Then it wouldn't fit in my car - and they drove it to my house! Awesomeness in spades! 
The table with its awful laminate counter top.

gorgeous detailing on the legs - I couldn't pass this up!
So I brought the table to my basement, squished between the totes of clothes and household items that would be accompanying my daughter to her new house and the stacks of air conditioners and piles of fabric and yarn that make up the detritus of any normal basement in a house of crafters with ADHD.


You can see on this photo of the table upside down that the wood on the top was all splintered and peeling away from the edge. I ended up wrapping the pages around the edge of the table top to give it more stability.

Sorry it's upside down, but this was on the bottom side of the table top. The Paine Furniture Co. was a famous furniture company started in the mid 1800's. http://www.painespatio.com/index.php?id=2 


I decided to paint the table white, but first I had to take care of that awful covering - which took some of the top layer of wood from the table when I pulled it off. The bad news was I needed to do a lot more work. The good news was that I had a gift card to Home Depot, and came home with a hand sander. I loooove power tools!


After sanding the top down, I painted the legs and top with a primer coat - Zinsser cover stain, which will bond to any surface and allows you to paint latex paint over stained furniture without stripping. I then started on my magical top - I took apart an extra copy of Harry Potter and the Prisoner of Azkaban, and laid the pages out so that some of my favorite parts of the story would be showing. I used Mod Podge to adhere them to the desk top, then sanded them a bit and covered the top with a polycrylic sealant. 
deciding which pages would go where, and which bits of the story were really important to be able to read
I also glazed the legs with a very light teal color, which is hard to see in these pictures, but adds just a little bit of extra special-ness for me to love. <3 <3 <3


I added the little footprints in keeping with this book, which is where the Marauder's Map is first introduced. <3